JOY Ornament Silhouette Project

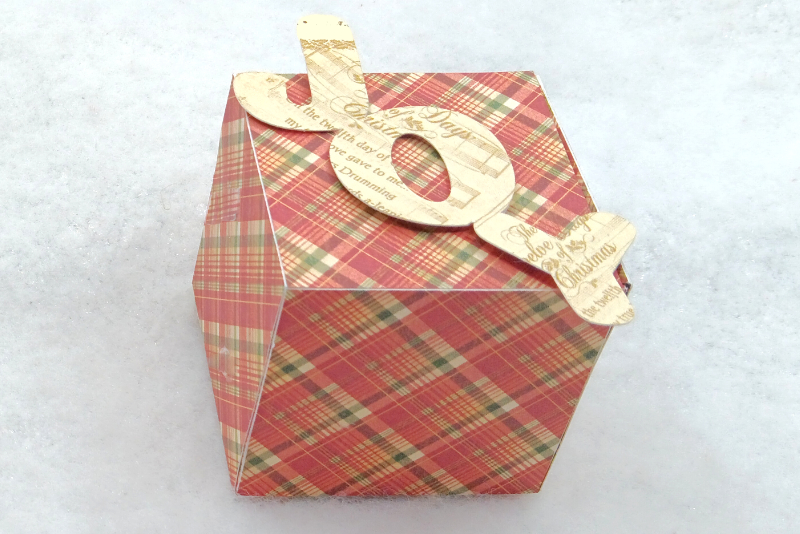
In this Silhouette Studio® tutorial, we will continue to work on the two inch cube box project. In the last tutorial, we created the cutting file for the box. Now we will cut and assemble the box. We will also design the word JOY as a second cut file. We will cut the word from patterned paper and glue it to the front of the box. This will give us a nice ornament for our Christmas tree.
In the last tutorial, we saved the cutting file as a .studio3 file. Let's open this file and cut out our two inch box from patterned paper. We will use a dark red patterned paper which will contrast nicely with the light patterned paper for the text.
Paper Used: Twelve Days of Christmas by Graphic45
The Silhouette Cameo 5 was supplied to me by Silhouette America.
Silhouette, Silhouette Studio, Silhouette Connect, PixScan, Silhouette CAMEO and Silhouette Portrait are either registered trademarks or trademarks of Silhouette America, Inc. Product screen shot(s) reprinted with permission from Silhouette America®, Inc.
In the last tutorial, we saved the cutting file as a .studio3 file. Let's open this file and cut out our two inch box from patterned paper. We will use a dark red patterned paper which will contrast nicely with the light patterned paper for the text.
- Open your cut file for the two inch box.
- In the Page Setup panel, set the Machine to Cameo 5, Feed Type to Auto/Manual, Cutting mat to Cameo and Media Size to size of your patterned paper.
- In the Send panel, open the Line section and set the red line color to the Cut Action. Set the green line color to the Score Action (see screenshot).
- Click the Send button at the bottom of the panel, to cut out the box.
- Fold along the fold lines and then glue the box together (see screenshot).
- Click File - New to start a new project cut file.
- In the Page Setup panel, set the Machine to Cameo 5, Feed Type to Auto/Manual, Cutting mat to Cameo and Media Size to the size of your patterned paper.
- Select the Text tool and click once on the cutting area. Type the letter J.
- With the J selected, set the Font to Coiny and the Font Size to 144 in the Quick Assess Toolbar.
- Repeat the previous steps for the letters O and Y. Place each letter beneath the previous letter (see screenshot).
- Move the O letter upward until the cut line for the O overlaps the cut line for the J (see screenshot).
- Repeat the previous step by moving the Y upward until the cut line overlaps with the O (see screenshot).
- Select all of the letters. Click the Weld icon in the Quick Assess Toolbar.
- Select the word and resize it to about 3 inches tall (see screenshot).
- Open the Send panel. You should have only one cut line.
- Click the Send button at the bottom of the panel.
Now we will tell the machine to cut on the cutting line and score on the score line. We will use the line color to do this.
Now we will design the JOY text. In the example, I used the Coiny font but feel free to use your own font choice.
Now we will Weld the letters together in to one word (see screenshot).
Now let's cut the word out of a light colored pattern paper (see screenshot).
- Glue the word JOY onto the front of the box.
- Glue a bow and string loop on top of the box for hanging.
Paper Used: Twelve Days of Christmas by Graphic45
The Silhouette Cameo 5 was supplied to me by Silhouette America.
Silhouette, Silhouette Studio, Silhouette Connect, PixScan, Silhouette CAMEO and Silhouette Portrait are either registered trademarks or trademarks of Silhouette America, Inc. Product screen shot(s) reprinted with permission from Silhouette America®, Inc.

Related Articles
Editor's Picks Articles
Top Ten Articles
Previous Features
Site Map
Content copyright © 2023 by Diane Cipollo. All rights reserved.
This content was written by Diane Cipollo. If you wish to use this content in any manner, you need written permission. Contact Diane Cipollo for details.


